

 Login
Login- Consulting
- Training
- Partners
- About Us
x
Big Data, MongoDB
 4 Mins Read

 May 21, 2014
MongoDB Monitoring Service or MMS is a free monitoring application developed by the MongoDB team to manage and troubleshoot MongoDB deployments. Once set up correctly, you get a bunch of metrics that can be very useful during troubleshooting production issues. MMS is also used by MongoDB team to provide suggestions and optimization techniques.
In this post, I will be briefing about the steps to install and few tips and tricks to setup MMS for one’s MongoDB cluster, without having to spend a lot of time.
On the whole, there are two steps to set up MMS for a sharded cluster.
1: Install and start monitoring agent on one of the nodes. Preferably on a mongos machine as it has access to all the nodes ( Shards and Config Servers )
2: Add the nodes to the MMS Console for monitoring
1. Firstly, create an account on mms.mongodb.com and login into MMS.
2. Get the monitoring agent installation instructions on the settings page.

3. Select the platform on which MMS agent needs to be installed to get the corresponding instructions.
4. The API keys would be needed to be updated on the configuration file after installing the agent. The API Setting page would have it. Before starting the agent, copy and paste the same into the configuration file.
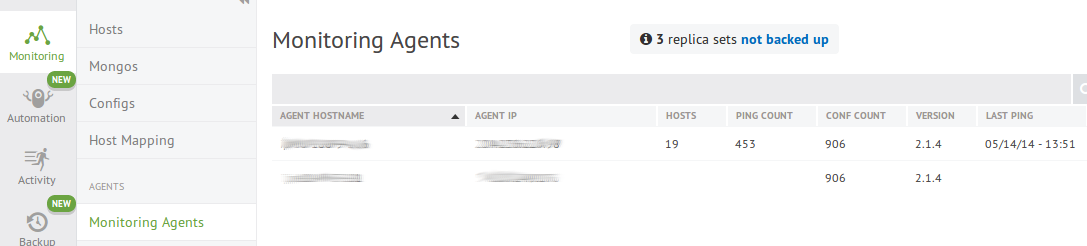
5. Now, on the MMS console’s Monitoring Tab, Click on “Monitoring Agents” and there should be one entry there with the details of the agent which include hostname, IP address, version etc. You can also install a backup monitoring agent on a different host.
Now that we have the agent set up, we can go ahead and add hosts onto the MMS console.
1. On the Monitoring Tab, Click on “Add Host” to view the below screen.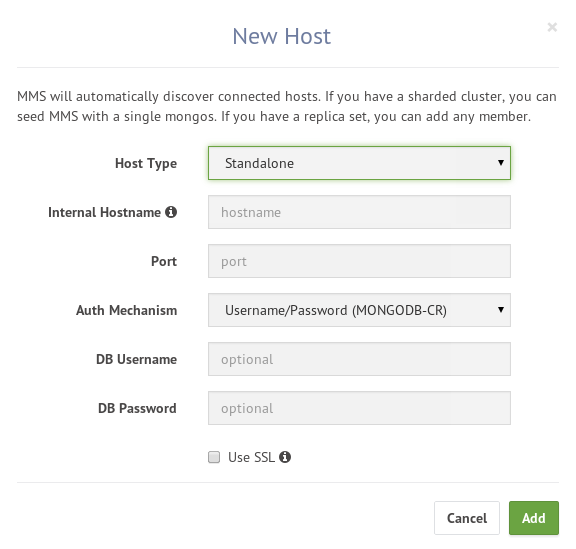
2. In the Host Type field, select the type of your MongoDB deployment. If you select —
One troubleshooting scenario I have faced many times is that the node gets detected once, it appears on the hosts screen but further connections fail and MMS would not receive any metrics from the node. In this scenario, all you have to do is restart the MMS agent and things should be fine.
Once the nodes start getting detected, they would all be separated by the type of host. All the shard servers would be under “Hosts” tab, mongos nodes would be placed under “Mongos” tab and config server nodes under “Configs”.

Clicking on the host name would redirect you to the corresponding metrics.
So, as i mentioned, restarting the monitoring agent and using the public/private IP that is used for configuring the cluster, should solve host detection issue. But please give MMS set up a try and in case you had to troubleshoot any new issue, please do post here.
SHARE

Case Study
By gopi
Apr 16, 2024


Case Study
By gopi
Apr 16, 2024

Power Platforms
By Rashi Mehrotra
Apr 12, 2024

Case Study
By Sohail Yaragatti
Apr 5, 2024

Case Study
By Sohail Yaragatti
Apr 5, 2024

Case Study
By Sohail Yaragatti
Apr 5, 2024
Case Study
By Sohail Yaragatti
Apr 1, 2024
Case Study
By Sohail Yaragatti
Apr 1, 2024
Case Study
By Sohail Yaragatti
Apr 1, 2024
Our support doesn't end here. We have monthly newsletters, study guides, practice questions, and more to assist you in upgrading your cloud career. Subscribe to get them all!
Comments